

For those who don’t know, Redbubble is a print-on-demand marketplace where artists can upload their art on various products for sale. Print-on-demand means that an artist only needs to upload their designs and Redbubble manages the rest of the process- from marketing and selling to distribution.
On Redbubble, artists can place their designs on many products including t-shirts, stickers, phone cases and duvets. Redbubble has become a particularly popular marketplace for buyers looking for distinctive and quirky designs.
How to set up your Redbubble account
If Redbubble sounds like something you would be interested in, I will describe how to set up an account:
- Navigate to redbubble.com.
- In the top-right corner, click Signup.
- Click Artist signup.
- Fill in your email address and shop name. I am naming my second store Photoray. Note: You cannot change your shop name in Redbubble, so choose a shop name that aligns with you or use your existing business name.
- Next, you will see the following dashboard:

- In the Set up shop pod, click Add an avatar.
- In the Edit Profile page that appears, add a photo of yourself smiling or your brand logo in the Avatar section.
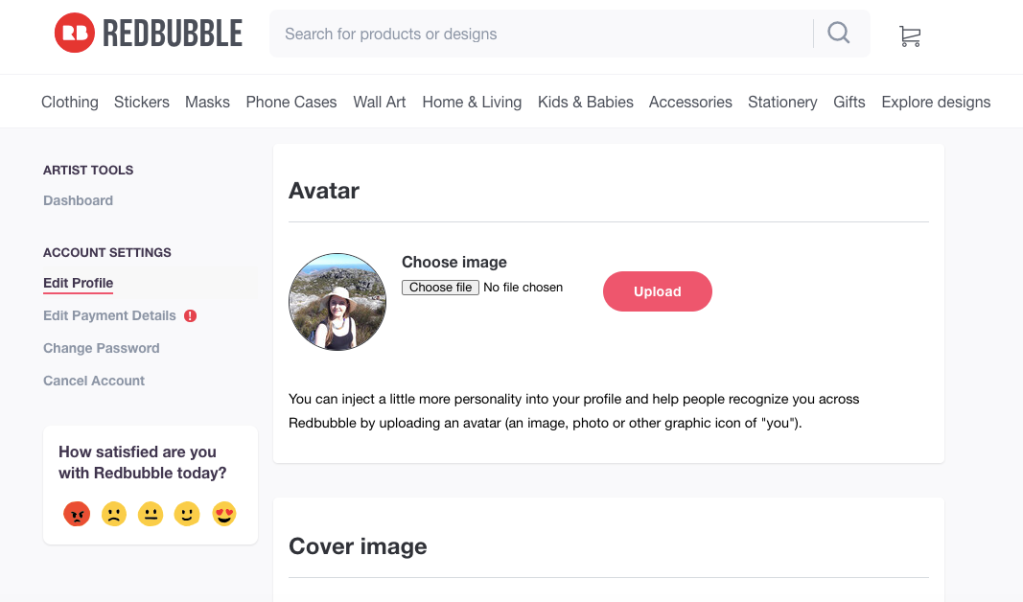
- On the same page, in the Cover image section, add a cover image that aligns with your avatar or brand in some way. Ensure that your cover image is at least 2400px x 600px. To upload your cover image, click Choose file then Upload.
- Next, in the Profile section, add a bio that describes who you are and what you are offering on Redbubble. Here is an example of my bio: “Hi, I’m Rachel from Ireland. I joined Redbubble to share some of my photography from my travels. You can find my designs on many products including t-shirts, stickers and phone cases.”
- Read through everything on the Edit Profile page to ensure that you are content with all the details. Click the Save Changes button at the end of the page.
- To return to the dashboard, click Dashboard on the left bar.
- In the Set up shop pod, click Add a social link.
- In the Link to Other Sites page that appears, add some hyperlinks of your social profiles and click Save at the end of the page. Adding social profiles reaffirms that you are a real person, which can be important to buyers.
- Return to the dashboard again. In the Get paid pod, click Confirm your email. This redirects you to the Personal details page where you can click resend confirmation email. Go to your email and click on the link from Redbubble to complete this step.
- Go back to the Get paid pod and click on Add your name & address. Again, you will be redirected to the Personal Details page. Simply fill in your name and address details. On the same page, you can also add your Paypal details for receiving payment.
- Lastly, and in my opinion the most exciting part – adding products! From the dashboard, in the Create products pod, click Add designs.
How to add your first design on Redbubble
- Gather some designs that you think are suitable for Redbubble. From experience on my main Redbubble shop, designs that work on as many products as possible work best, such as patterns and scenery-based designs.
To view Redbubble’s full product list, click Add designs in the Create products pod, followed by Upload new work to learn more about the products and sizes. Test out any photo, you don’t need to publish it.
Note: As of May 2021, the largest items on Redbubble are the following:
- Duvets, comforters and shower curtains at 7632 x 6480 px
- Jigsaws at 9075 x 6201 px
- Using the largest items as a base, export your suitable designs at a width of 9075px at least. If the matching height value of your design is lower than 6480px, export your design at a separate size for duvets, comforters and shower curtains.
Note: Depending on your design, you may need to export or modify it in many ways to suit all products. To learn more about sizes for a particular product, in the Add new work page, click the Edit button next to each product.
- When you have resized your design in Photoshop or other, upload your design and add some details in the Add new work page.
- Add a descriptive title for your design. Then add about 15 tags that capture any colours and themes related to your design. Also add a short description.
( Recoomended size is 4500x5400 px)

- Click through each of the products to ensure that they are enabled for your design. You may need to click the Edit button to resize your design, add a different colour background or create a pattern.
- You may also notice that not all products are enabled for your design. To enable them, click Edit and tick the checkbox next to the products.
Pro tip: In Standard Print Clothing, kids clothing is never switched on so do this!

- In the Edit area, you can also change the markup from the default 20%. Redbubble works on a cost price x your markup = final product price model.
- When you have edited and enabled all the products, review the area at the end of the screen to suit you. In the Default product in your shop area, depending on your design, you may want to set it to a specific product that really suits your design. I would recommend keeping the default product as Optimized (recommended) since it is not easy to revert.

- Click Save work.
- In the next page, you can review all your products to ensure that they appear satisfactory. To make further edits, click Edit. To view your products more clearly, click View.


- When you have added your first design, your profile appears more complete. To view your shop, click your avatar in the top-right corner and click View Shop. To add more work, click Add New Work.
- To make your profile initially complete, you must add at least 5 new designs. After adding your first 5 designs, your shop should look like the following:

When you return to your dashboard, you will now see a full dashboard setup with different options.
How to create a collection in Redbubble
To make your profile even more complete, I would recommend setting up collections in Redbubble. Collections are customisable categories that you can create based on your own designs. They appear on your shop page and help buyers navigate your designs.
- Click on your avatar in the top-right corner and click Manage Portfolio.
- Click the checkbox on one of your designs and a new menu appears at the top of the page.
- Click Collections and type a new collection name into the blank space. Then, click the plus sign.
- In the same dialog area, click the new collection created, followed by Add.
- To see your new collections, click on your avatar again, followed by Your Shop.
- With the collections added, your shop should look something like the following:

- If you want to take collections a step further, you can also add a featured collection to your shop.
- To add a featured collection, click on your avatar again and click Dashboard.
- Click Shop Settings and in the Choose Collection dropdown, select a collection you want to highlight.
- Click Save Settings.
My top tips for getting Redbubble sales
While I set up a second account for the purpose of this blog post, for tips on getting sales, I am referring to my main account.
Upload as many designs as possible
If you are already an artist outside of Redbubble, you should have a large database of designs to choose from already. If you are not already an artist, but you are interested in uploading to Redbubble, I would recommend searching current trends and creating designs around those keywords. There are many ways to do this, but the easiest way is to click into the main Redbubble search bar. Any trending items have an arrow next to them. See an example here:
Optimise your designs for each product
In total, there are around 94 products on Redbubble. So logically, the more products you have your designs optimised for, the higher chance of you have of gaining more sales. I have noted this already, but ensure your design is 9075 x 6480 px to fit all products and eliminate any unwanted white spaces.
Note: Even if your design is this optimum size, some white space may still appear on some products due to specific product design ratios. To fix this, look up what size your design should be for that specific product and adjust your design accordingly. To replace a design for a specific product, find your design within Manage Portfolio, click Edit and use the Replace Image feature within the Edit area.

Promote your shop on social media
While Redbubble does a great job of marketing designs, you should also promote your shop regularly on other social media platforms such as Twitter, Youtube, Facebook, Pinterest and Instagram. Redbubble already provides automatic mockups of your work so use these for convenience. To access these mockups, return to Manage Portfolio, click the gear icon next to a design and click Promote products. From here, you can share your designs directly on social media or download the images and upload them in your own way.
Create more popular designs
If you find that a particular design is selling well or generating a lot of ‘favourites’, create more designs around this theme. Also, create more variations of this design simply by changing the colour, or font and so on. Redbubble allows you to upload many variations of any design.